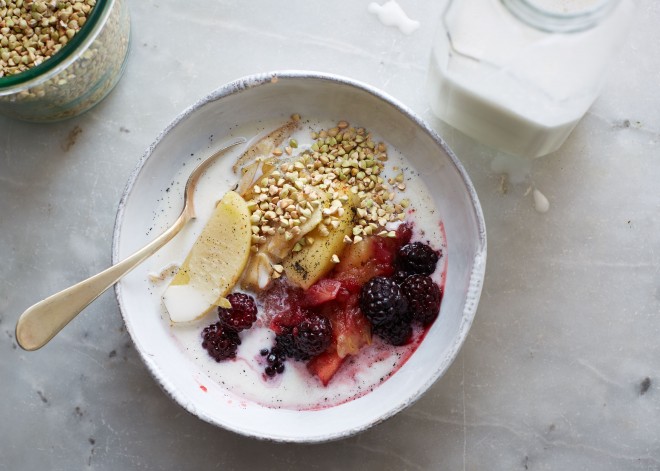
Warm apple buckwheat breakfast bowl
POSTED ON January 10, 2015
Happy New Year to you all! After a busy and fun holiday period with family visiting from Australia and work beginning early this week, the New Year feels like it arrived suddenly while I wasn’t watching. But here it is—the fresh blanket of snow this week gave me the light feeling of new beginnings and the hope of a slower pace…at least for the moment.
Although it has been a few weeks since I posted here, I’ve felt connected to many of you through the lovely messages and instagram pictures of my book being given and received over the holidays. It has been inspiring and uplifting to see my recipes being made all over the world. Thank you from the bottom of my heart for all the support!
I’m excited to announce that the book is already in its second printing and even made it to #89 in the Top 100 books on Amazon before briefly selling out. I’m also happy to report that many independent bookstores have been selling lots of copies too — I’m grateful that so many of you have gone out and supported them!
Now on to the recipe…it’s a simple one to start the year.
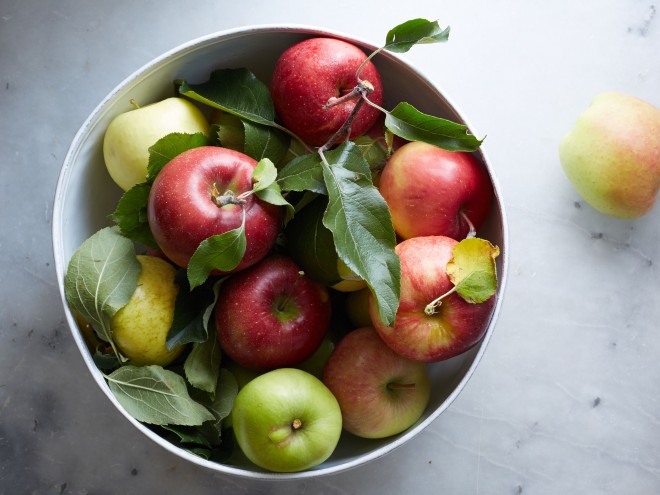
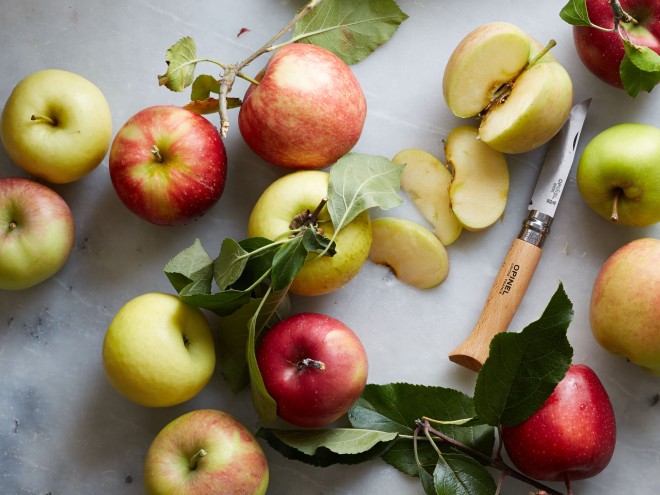
Last fall I went apple picking with a group of friends in upstate New York. Since I only eat a few raw apples a year—usually while picking them—the trip out of the city is more about the occasion than the actual apples themselves. After giving away the bulk of my loot, I stewed what remained and enjoyed adding them to my breakfast routine. Eating stewed apples with sprouted buckwheat cereal, berries and warm almond milk created a nice change from my usual breakfast staples and is perfect when you want to add a little sweetness to your bowl.
Once you have a pot of cooked apples you can use them in many different ways — as a topping for oatmeal or pancakes or blended into smoothies. For a healthy dessert, try adding some to a teacup and topping them with toasted walnuts and a plash of nut milk. If you eat yogurt, adding a spoon full to warm apples is pretty heavenly too.
As I was looking for ways to make buckwheat cereal (without a dehydrator), I found a recipe in The Vibrant Table by Anya Kassoff. Her book has lots of helpful tips about soaking, germinating, and sprouting grains, nuts and seeds. And, also many creative recipes that strike the perfect balance between delicious and healthy. She has also inspired me to start grinding my own sprouted flours, and that was before I had the pleasure of meeting her in person!
I have purchased this sprouted buckwheat cereal occasionally over the years—it’s a great topping for stewed apples and nut milk. I love that it is not sweetened at all and adds the desired crunchy topping to many different breakfast bowls.
Photos by Stephen Johnson
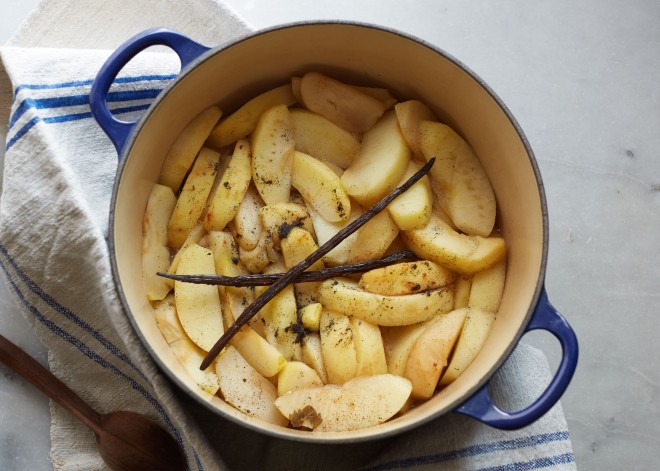
Stewed apples
Serves 4 to 6
5 medium-large apples, peeled, cored and sliced in ¾ inch pieces
Large pinch cinnamon
1 vanilla bean, seeds scraped
1 teaspoon vanilla extract
½ cup filtered water
Add all ingredients into a medium pot and bring to a boil over high heat. Cover pot, reduce heat to low and simmer 30 to 35 minutes or until apples are tender. Remove from heat and allow to sit for 10 minutes or longer before serving.
Warm apple buckwheat breakfast bowl
The measurements for this bowl can be adjusted to your taste. I usually top this with ground flax seeds, bee pollen and a sprinkle of maca powder.
Serves 1
½ to ¾ cup stewed apples
1/3 cup frozen black berries
¼ buckwheat crispies, see recipe below
Warm or cool nut milk to serve
Place stewed apples in a small pot over medium heat. Add black berries and cover pot. Cook for 2 to 3 minutes or until apples and berries are warm. Remove from heat, place in a bowl and top with buckwheat and nut milk. Serve warm.
Buckwheat crispies
I hesitate to post recipes that use a dehydrator, as I know most people don’t have one. If you own one use it for this recipe, as it is the most efficient way to get the buckwheat crunchy.
Adapted from The Vibrant Table: Recipes from My Always Vegetarian, Mostly Vegan and Sometimes Raw Kitchen (Roost Books 2014) by Anya Kassoff
Makes just over 2 cups
2 cups raw buckwheat groats
Place buckwheat in a bowl or wide mouth jar and cover with 2-inches of filtered water. Set aside to soak overnight or for at least 8 hours.
Line a rimmed baking sheet with a clean dry kitchen towel and set aside.
Drain soaked buckwheat into a large strainer and rinse really well until it’s no longer slimy. (This may take longer than rinsing other grains but is important to maintaining its taste and texture).
Set aside to drain well tapping the bottom of the strainer to encourage more water to release. Spread buckwheat over the cloth-lined tray and set aside to air dry (in a dry spot) for 24 hours to or until the buckwheat is crisp and dry.
I found that I needed to change the towel half way through, as it got quite damp. The amount of time will depend on the humidity and temperature of your kitchen.
If you have a dehydrator you can dehydrate the buckwheat overnight at 115 degrees or until crisp.
If you find that after 24 hours your buckwheat is still not crisp you can place the tray (remove the towel) in warm oven that is turned off. I did this recently after using the oven I turned if off and let it cool slightly before putting the tray of buckwheat inside and leaving it until crisp and dry.
Once the buckwheat is crisp and completely dry store it in a jar in the fridge for up to a month.
Anya suggests sprinkling the buckwheat over salads, desserts or grinding it into flour.
POSTED IN Breakfast, Gluten free
never miss a recipe!


 tweet it
 pin it



Do you need to air dry the buckwheat if you have a dehydrator? If so, can the grains go on a Teflex sheet or do they need to be on a towel? It sounds like a yummy recipe and I’m anxious to give it a dry. I’m always looking for new things to do in my dehydrator and for things to vary the grains I eat for breakfast.
Julie
Hi Julie, You can just drain the buckwheat and then spread it over the Teflex trays to dehydrate, no need to use the twoel or to air dry.
Enjoy! Amy x
Dear Amy,
nice post! Happy New Year for you and your family!
I am writing you from Buenos Aires, Argentina, and in our stores we can only have black buckwheat. Have you seen it? I don´t know if it is whole buckwheat, I mean, if it has still the bran on it. I don´t know how to use it. Any advice will be very appreciate it.
Warm regards! Very warm from our 95F degrees now! Hot!
Marisa
Hi Marisa
Thanks for writing. I have seen black buckwheat but never used it before. I’m pretty sure it’s a wholegrain. I would try soaking it and see if it softens. Regular buckwheat soften up pretty quickly. Please let me know how it goes. I’m curious!
Amy x
Thanks Amy, I will try it and will let you know.
Thanks again for your response.
Regards!
Marisa
Dear Amy,
it’s me again.
Look at what I’ve found on the web.
**Unhulled buckwheat groats are dark brown, almost black in color and are used for sprouting instead of cooking because they still have their inedible outer coating.
Therefore, I’m afraid I can´t use them. Pitty!
You can suscribe to my blog too, as I did with yours, so we can keep in touch! My blog is in Spanish and Italian, but as you may know, food is an universal language!
Here’s my blog:
http://www.cocinayletras.com
Let me know your comments. I will really appreciate them!
Thanks again!
Marisa
Yes, I remember them having a very hard shell. You could use them to grow actual sprouts and eat the sprouts.
I look forward to checking out your blog!
I own 3 Excalibur dehydrators, so this is perfect! Thanks for posting it. ☺
I’m wondering why the groats would need to be stored in the refrigerator once fully dried? and also have a one month usage period?
I have used this technique with various types of grains, seeds and legumes and once dried, I store them on a shelf in my basement with all my other food storage. I don’t use the refrigerator and have not experienced any spoilage (and I have some that are ‘years’ old).
What makes the storage of buckwheat groats different?
Thanks Again!
Hi Lisa,
Thanks for writing. I think its fine to store dehydrated grains in a cool place but since the air dry method doesn’t get them as crisp I think its safer to store in the fridge. Since they are eaten as is they taste best fresh but I am sure they would last longer–again if you’re dehydrating them they are crunchier and will last longer.
Happy sprouting!
Amy.
Hi Amy,
Just reposting my last message. I think it got lost in the pile since I didn’t get a reply.
____________________________________________________________________
Lisa says:
Hi Amy,
Thanks for your quick reply.
Question – is the purpose of soaking the buckwheat groats to actually sprout them before drying?
It’s not mentioned in the recipe, but to me it seems to be the only reason for the soaking – otherwise we are taking dried groats, wetting them, and drying them again ☺
I tried making some yesterday right after I found your recipe (and posted). I put the groats in a bowl to soak at 3 p.m. and set the timer for 8 hours (the min. soaking time listed). They were done soaking at 11 last night. They were swollen; much larger, but not sprouted (again, not certain if that was the intent – if so, 8 hours was not long enough). I rinsed them very well, then spread them out on paraflexx sheets and put them in the dehydrator at 115 overnight.
I woke up to very dried, very crispy, incredibly hard buckwheat ‘crispies’ that ~seem~ to be too dry (for me anyway). They are incredibly hard, like little rocks, and impossible to break with my teeth while chewing. This was after 8 hours of drying at 115 (temp verified with thermometer).
I cant eat them as they are; I have sensitive teeth and they are just too hard. I’m going to try soaking them in warm milk to see if they soften up and eat them that way – that would be delicious as well. If that doesn’t work, then i’ll grind them into a powder and have another item to add to my smoothies 😀
If the purpose of soaking was to actually sprout them, then they needed several more than 8 hours of soaking time (and if so it might help others if you update the recipe to say “soak until sprouted which should be a minimum of 12 hours”). I’m not sure if I mis-understood the purpose of the soaking/recipe or if the groats are supposed to be this hard after drying and just too hard for me.
Look forward to hearing back.
Thanks again for another great dehydrator idea. Keep em’ coming. I often go into ‘dehydrator withdrawal’ during the winter months when I have no veggies from the garden to dry! ☺☻☺
Lisa
Hi Lisa, I’m sorry I missed your reply…it doesn’t show up in my email so I’m only seeing it by chance…I think you may have to comment again for me to see it…? Not sure.
Anyway, when you want to sprout any grain or bean or seed you have to soak it first, then it needs to be drained in order to sprout. Things will sprout in a strainer and it will take at least two days, quinoa will sprout in about 24 hours. When you soak grains, beans, seeds or nuts with skins (for 10 to 12 hours) you remove phyic acid which blocks nutrient absorption, sprouting makes them even more nutritious. So even if you are just soaking and drying the buckwheat you are making the nutrients more absorbable.
Buckwheat does become very soft after soaking which is why it can be blended easily after soaking for a few hours. It sounds like you have another variety of buckwheat and I think I have seen it–darker brown than the one in my post and very very hard even after soaking. I’m not sure what people do with this and I haven’t seen it that often but try finding a light cream-green colored groat.
I hope that clears up your questions!
Hi Amy,
Thanks for your quick reply.
Question – is the purpose of soaking the buckwheat groats to actually sprout them before drying?
It’s not mentioned in the recipe, but to me it seems to be the only reason for the soaking – otherwise we are taking dried groats, wetting them, and drying them again ☺
I tried making some yesterday right after I found your recipe (and posted). I put the groats in a bowl to soak at 3 p.m. and set the timer for 8 hours (the min. soaking time listed). They were done soaking at 11 last night. They were swollen; much larger, but not sprouted (again, not certain if that was the intent – if so, 8 hours was not long enough). I rinsed them very well, then spread them out on paraflexx sheets and put them in the dehydrator at 115 overnight.
I woke up to very dried, very crispy, incredibly hard buckwheat ‘crispies’ that ~seem~ to be too dry (for me anyway). They are incredibly hard, like little rocks, and impossible to break with my teeth while chewing. This was after 8 hours of drying at 115 (temp verified with thermometer).
I cant eat them as they are; I have sensitive teeth and they are just too hard. I’m going to try soaking them in warm milk to see if they soften up and eat them that way – that would be delicious as well. If that doesn’t work, then i’ll grind them into a powder and have another item to add to my smoothies 😀
If the purpose of soaking was to actually sprout them, then they needed several more than 8 hours of soaking time (and if so it might help others if you update the recipe to say “soak until sprouted which should be a minimum of 12 hours”). I’m not sure if I mis-understood the purpose of the soaking/recipe or if the groats are supposed to be this hard after drying and just too hard for me.
Look forward to hearing back.
Thanks again for another great dehydrator idea. Keep em’ coming. I often go into ‘dehydrator withdrawal’ during the winter months when I have no veggies from the garden to dry! ☺☻☺
Lisa
Happy New Year Amy! I have to tell you I am loving your book (have been cooking my way through it like mad the past couple of weeks):) Some great, healthy and satisfying meals for the New Year!
Hi Asha,
I’m so happy to hear that you’ve been cooking like mad! Thanks so much for writing and for your support!
Happy cooking!
Amy x
Dear Amy!
I adore stewed apples and often have them for breakfast. Your recipe sounds very interesting and I really want to give it a go, I will just have to wait until I have access to an oven again (I know, how can one live without an oven?).
Is there a reason why you usually don’t eat raw apples?
Best wishes,
Nina
Hi Nina,
Thanks for writing! It is hard to imagine life without an oven…but I’ve also had to live without one and you can get quite creative! I just don’t eat a lot of fruit unless I’m craving sugar but mostly I just eat berries.
Amy x
Thank you so much for taking the time to answer. I cannot wait until your book comes out in the UK, maybe you’ll even come over for the release.. 🙂 Nina x
Hi Amy,
this is very much my type of breakfast. SO, so yummy.
I recently got your book and absolutely LOVE it. I can’t wait to cook from it and share it on my blog. I shall keep you posted via instagram if I may.
wishing you a happy New Year and thanks for sharing this stunning recipe.
Hi Amy,
That looks like the perfect winter breakfast. And what amazing news about your book, congratulations!
Thanks so much for mentioning mine 🙂
Anya
It’s my pleasure Anya! I’ve been looking at your book lots lately and found so many great recipes I want to make….lemon bars, fig cup cakes (can’t believe they’re vegan, gluten free and whole grain!) and the plum ice cream! It’s rare to find a book that uses all the ingredients I love. Hope all is well. Xo